
Step-by-Step Connection Process
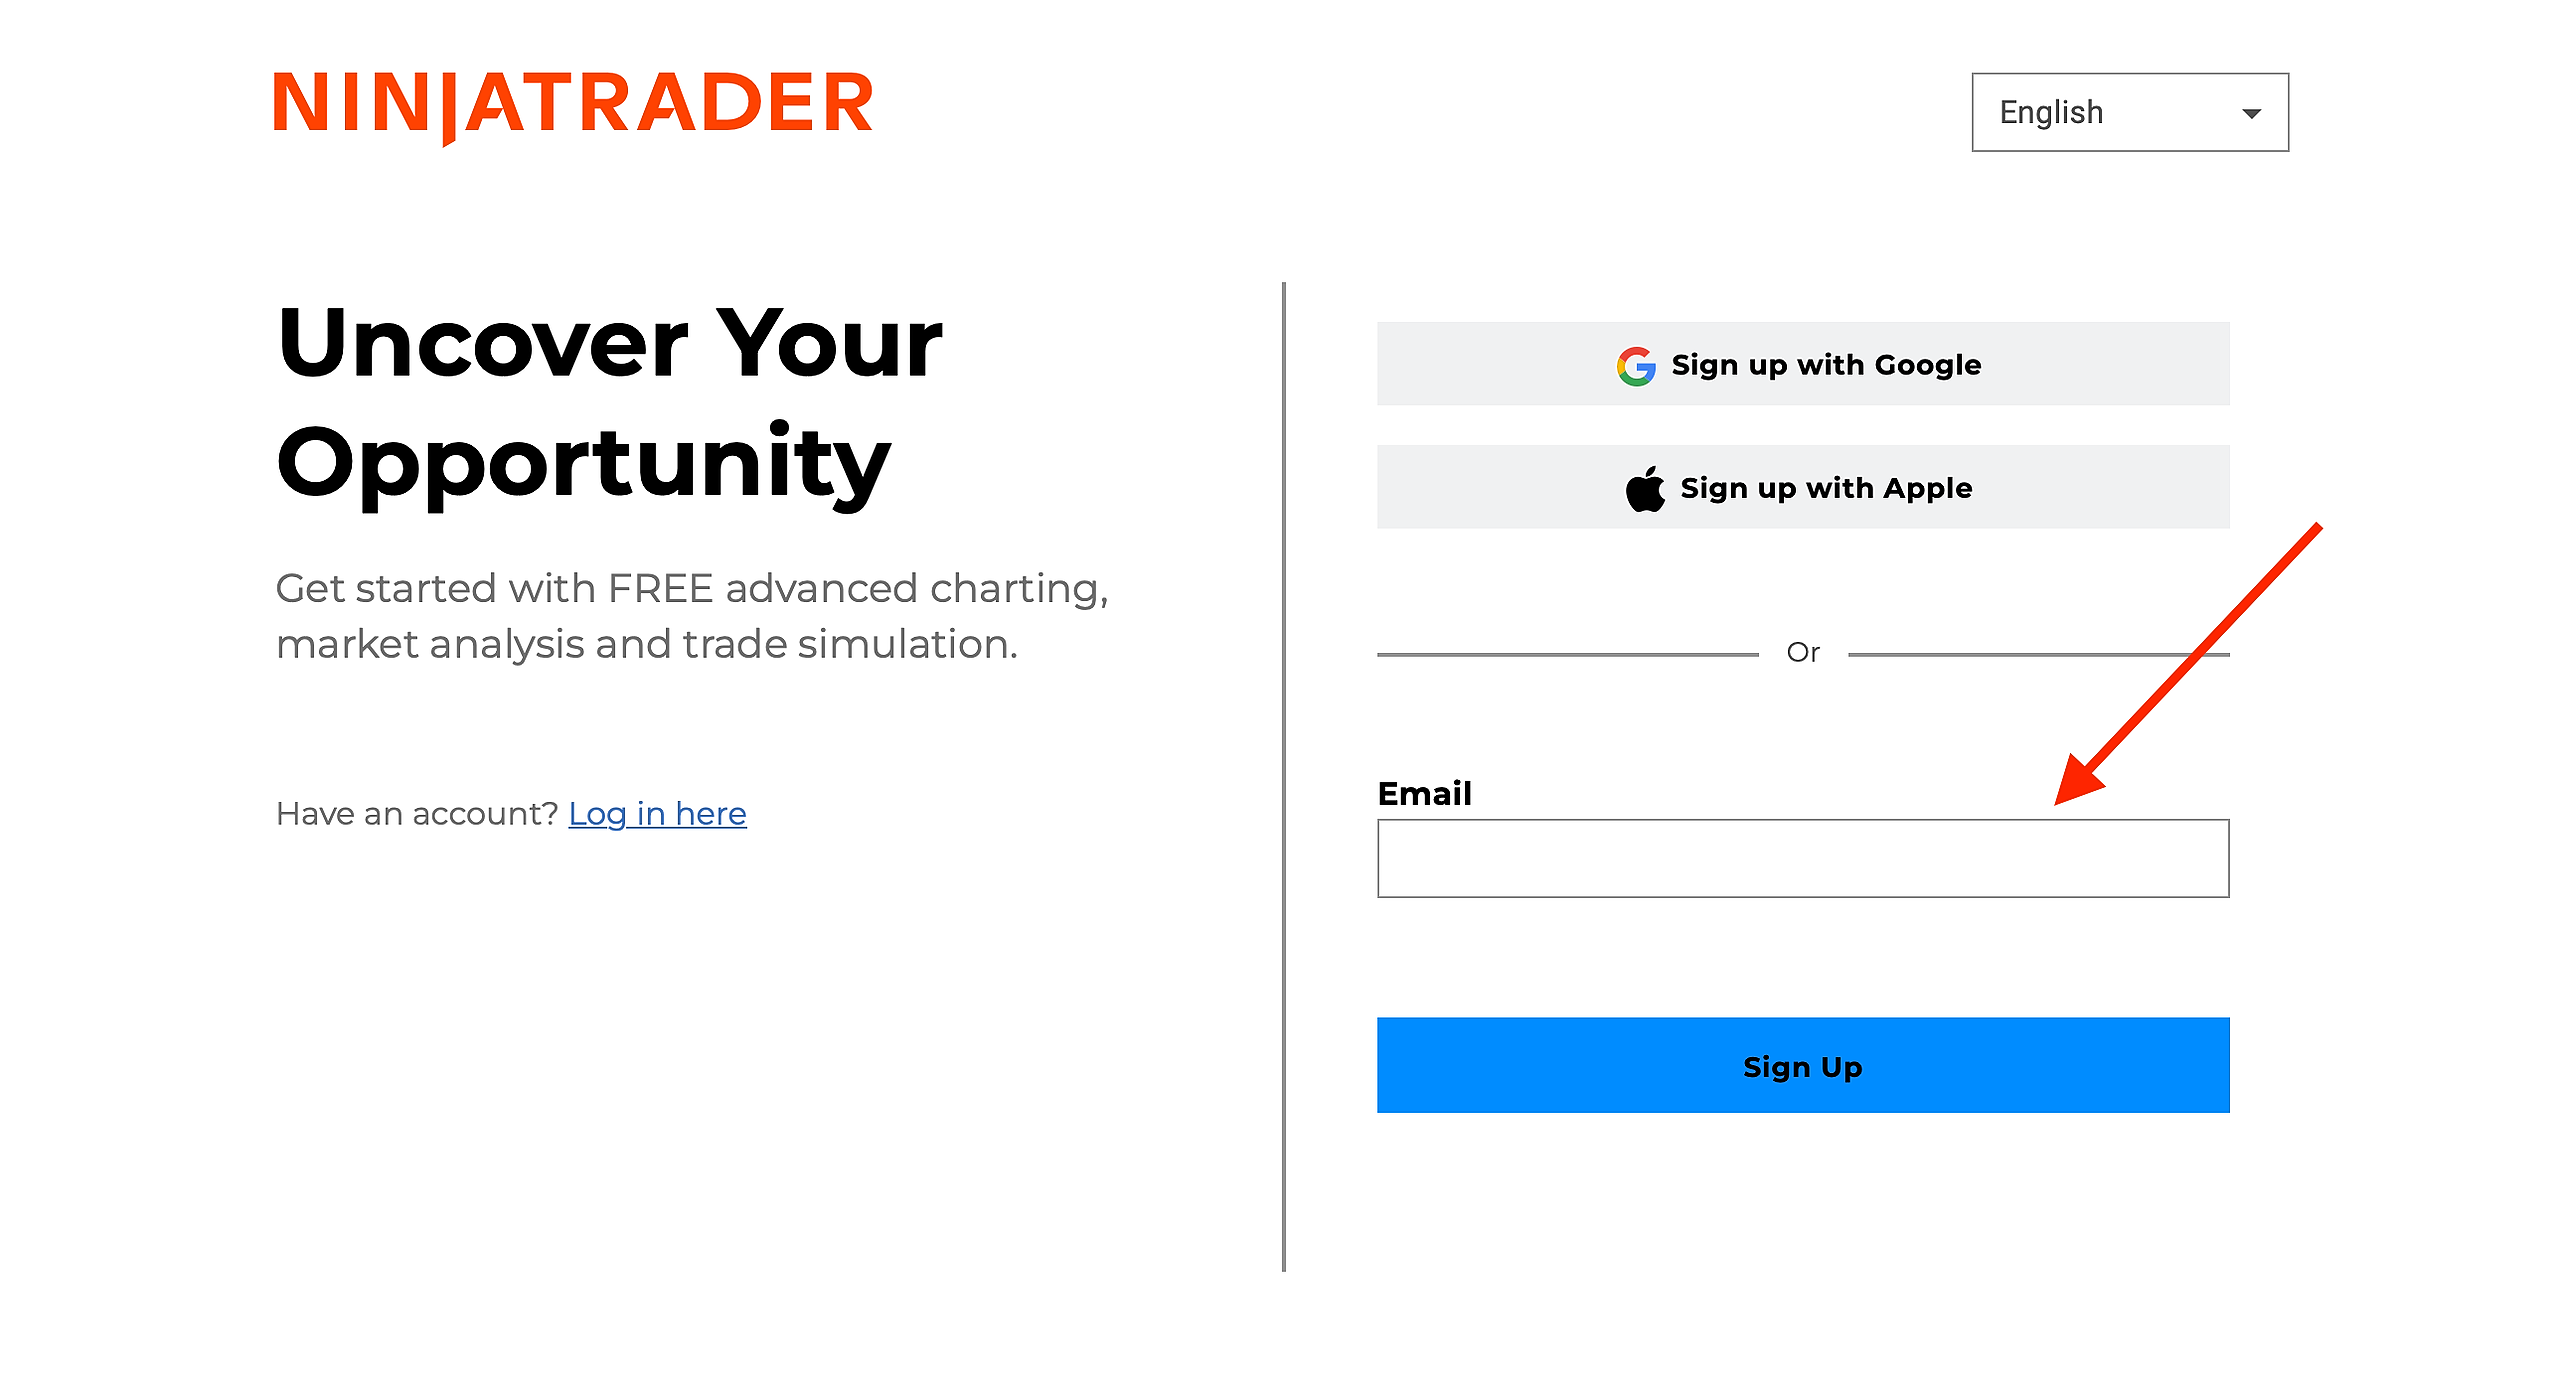
Step 1.
Go to the Ninja Trader website and register enter your email, and click Sign Up.
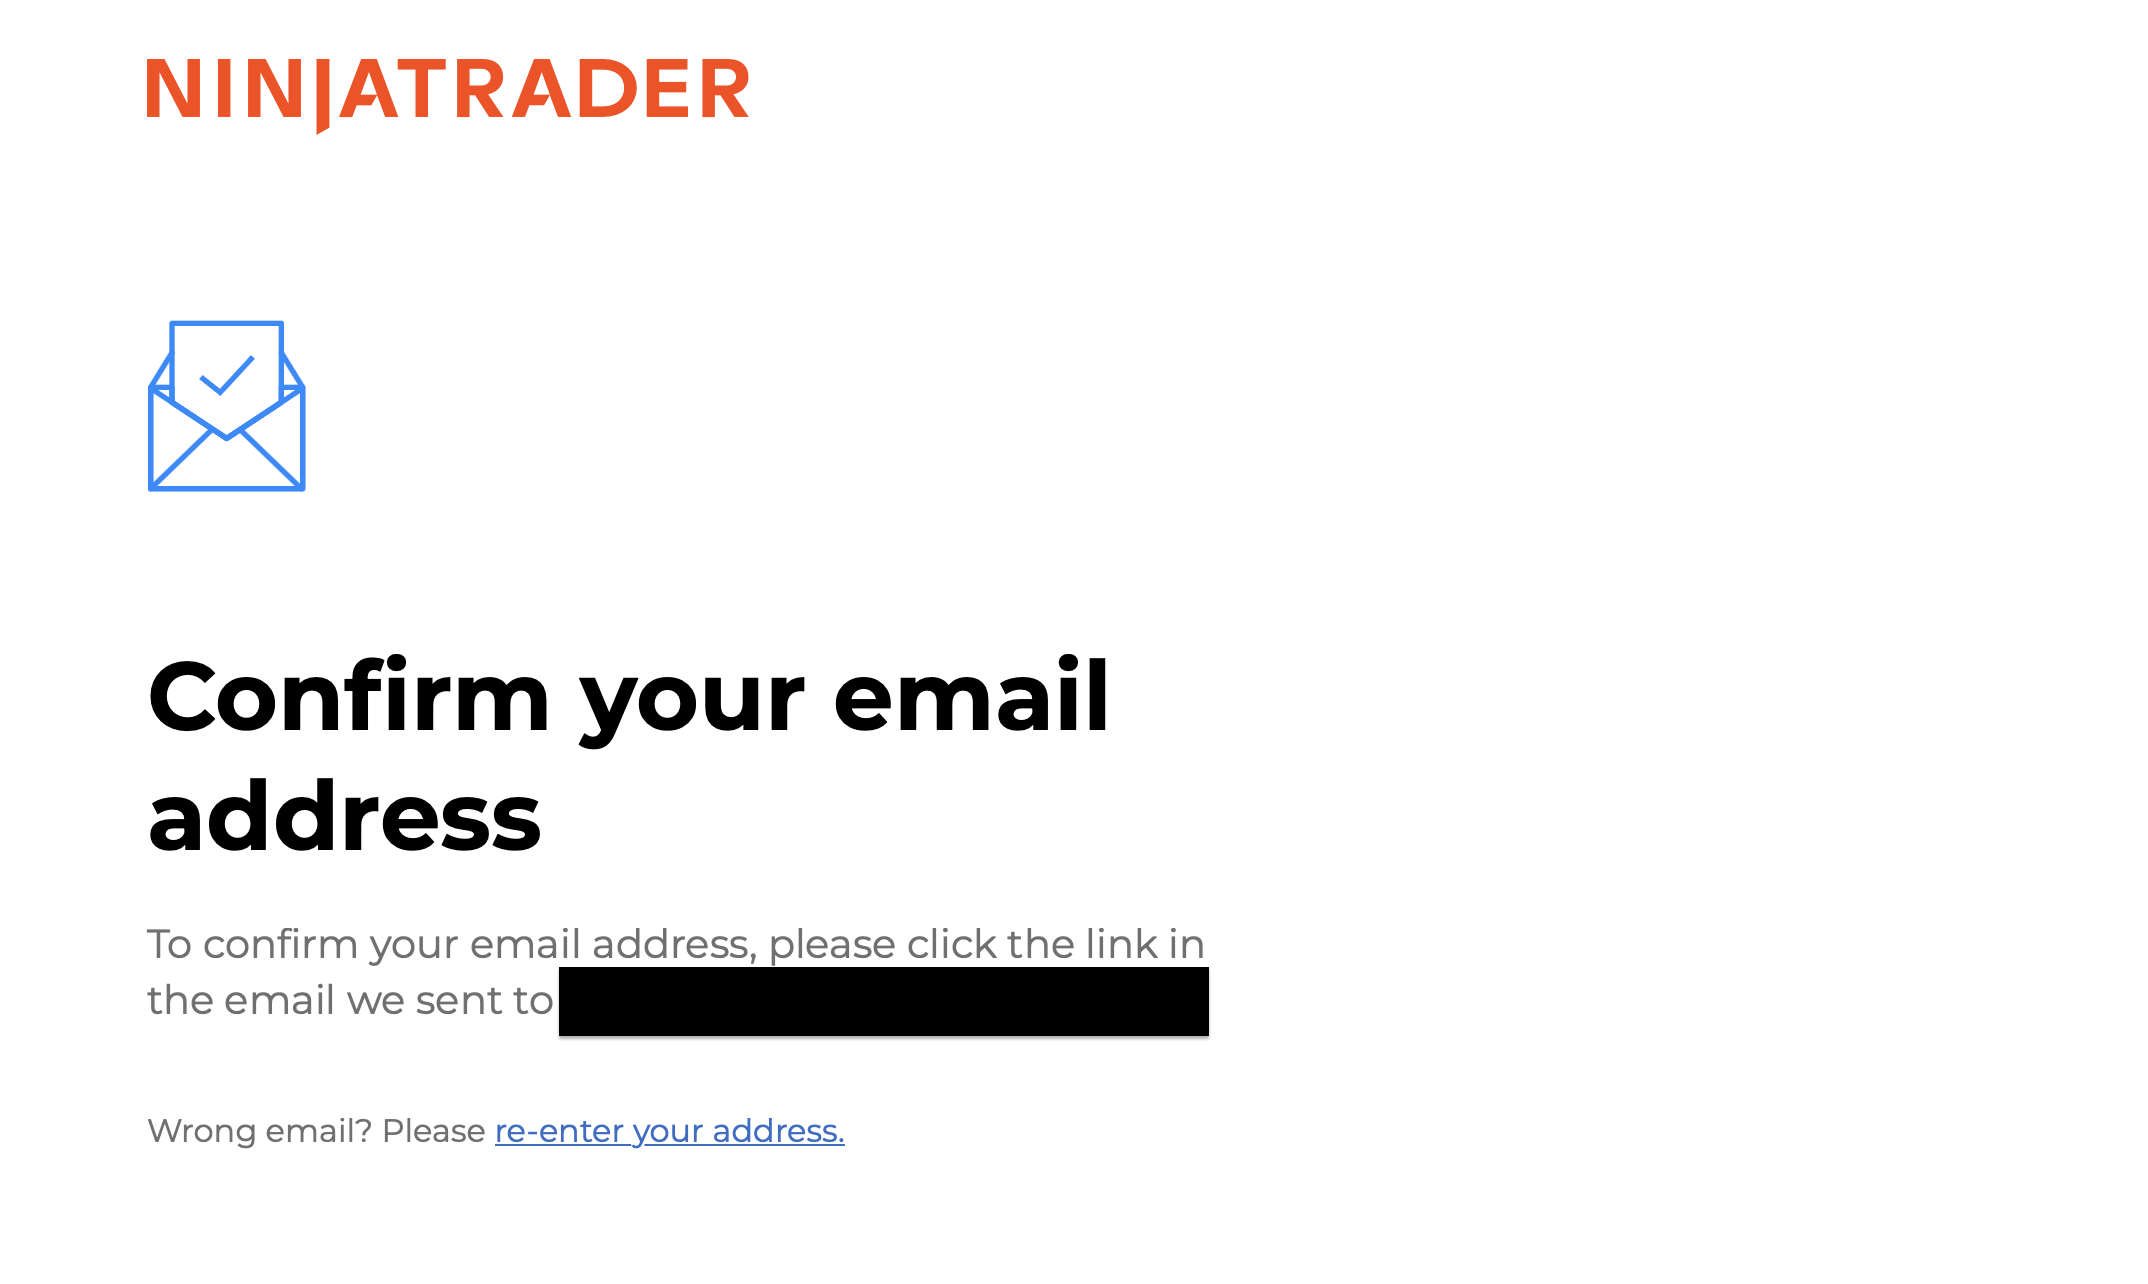
Step 2.
Confirm your email address when prompted on the next screen.
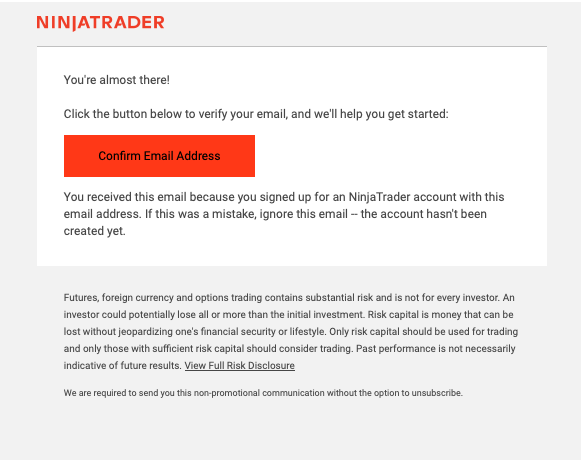
Step 3.
Check your email for a confirmation request and select Confirm Email Address.
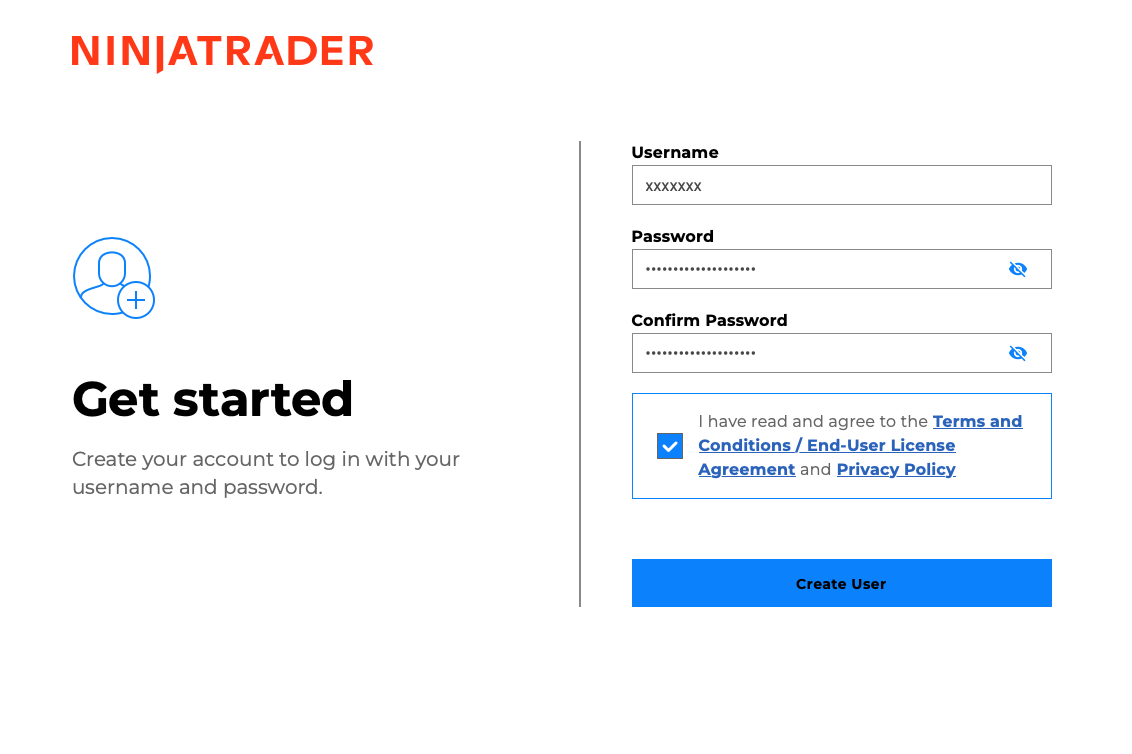
Step 4.
Create a Username and Password. Read and agree to the required documents. Then select Create User.
Step 5.
Click on Additional options. Select Download Desktop Platform.

Step 6.
Under Most Recent Release, select Download to install NinjaTrader.

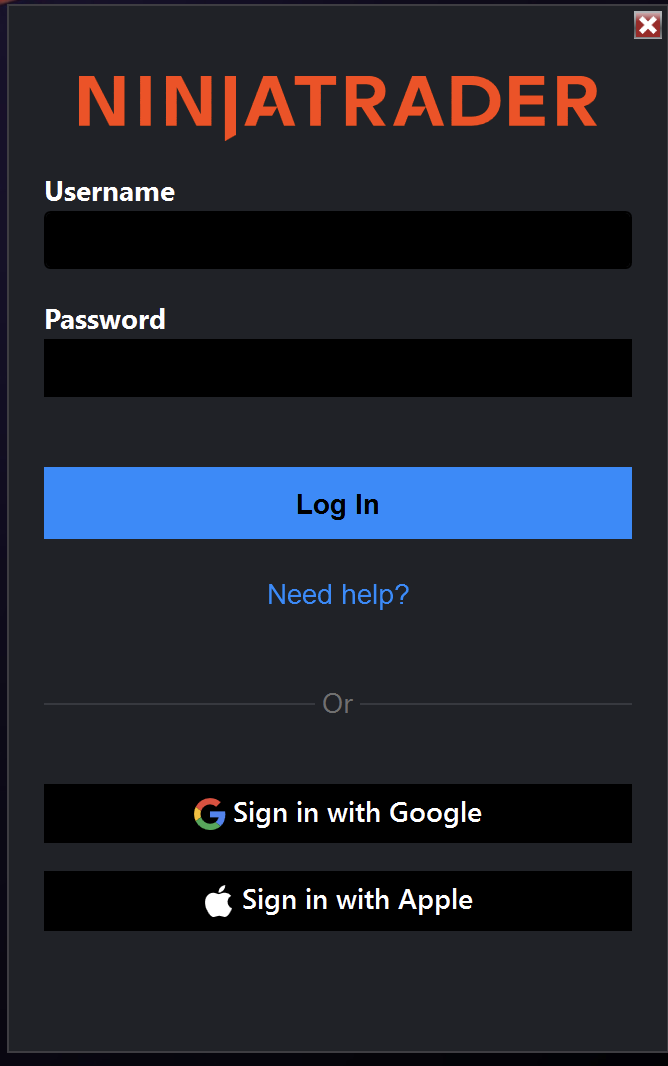
Step 8.
Log in using your NinjaTrader username and password.
Step 9.
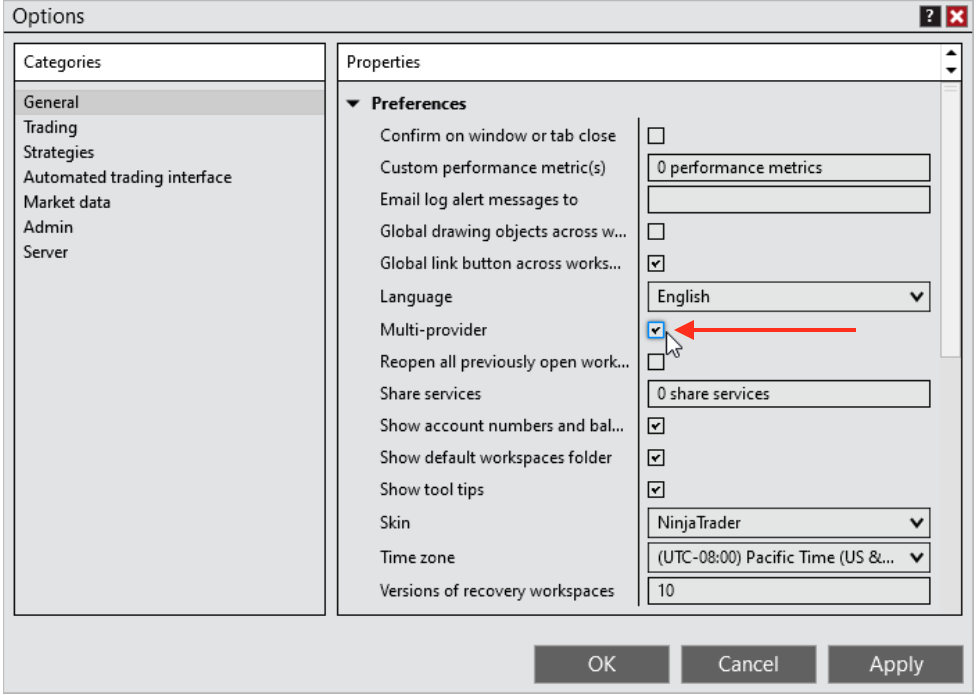
From the Control Center, go to the Connections menu and select Configure. If Configure is not visible, ensure Multi-Provider is enabled under Tools > Options.
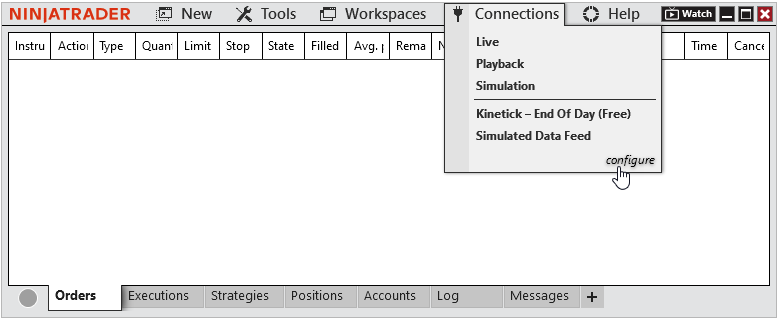
If Configure is not visible, ensure Multi-Provider is enabled under Tools > Options.
Step 10: For Tradovate (CQG) credentials, select NinjaTrader and click Add.
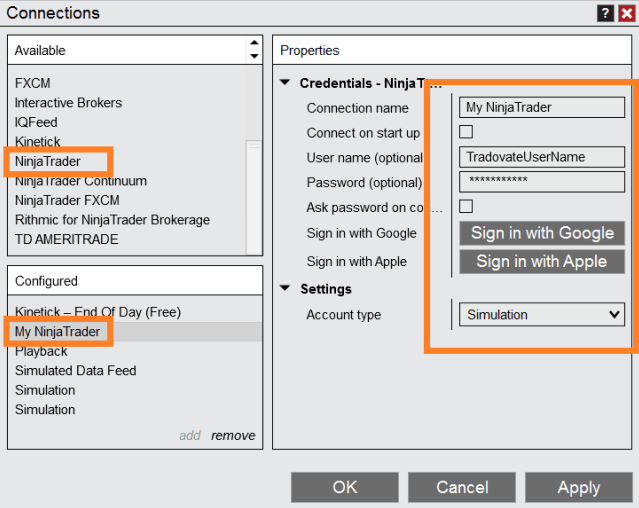
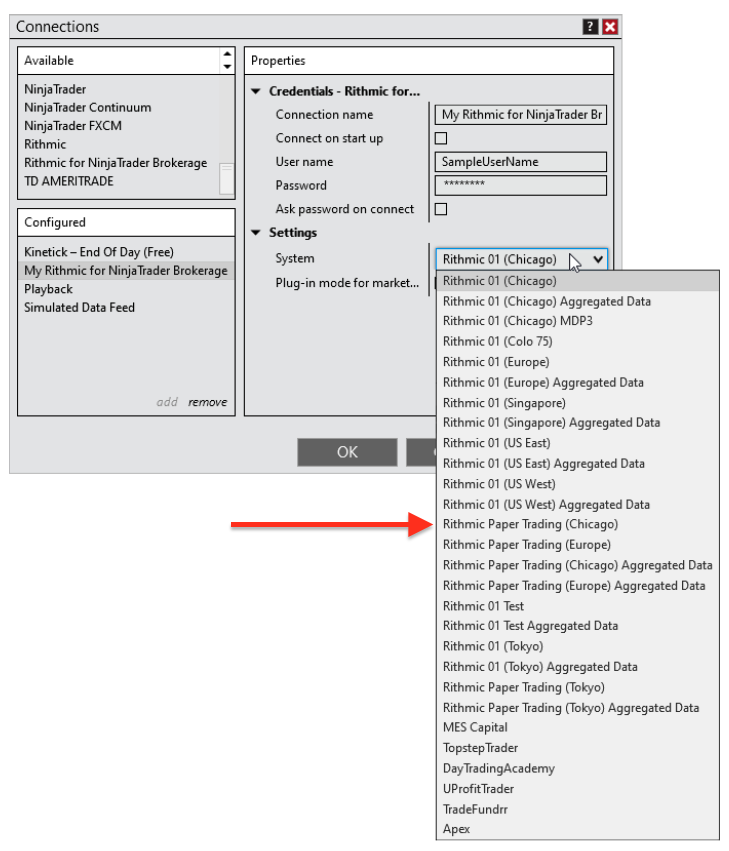
Step 11: For Rithmic credentials, select Rithmic for NinjaTrader Brokerage. Under System, choose Rithmic Paper Trading (Chicago).
Step 12: To connect your account, go to the Control Center, select the Connections menu, and choose the correct Connection name. A green light in the bottom left corner confirms your connection.
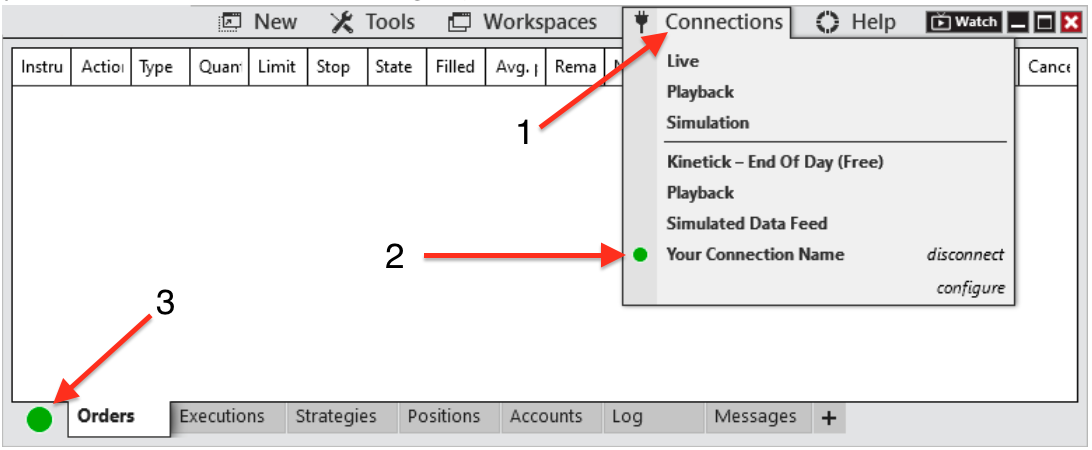
That is it; you are connected! You may begin your trading journey with Elite Trader Funding.